

Table of Contents
Introduction
Are you just getting started with your WooCommerce store and struggling with WooCommerce products import? Don’t worry! In this guide, we will show you two methods on how to import products into WooCommerce:
- Method 1: Manual WooCommerce CSV importer
- Method 2: Upload products to WooCommerce automatically
Let’s explore the details of each method!
Why Import Products Into WooCommerce?
Unlike manual product updating (add products to WooCommerce one by one), WooCommerce product import (aka WooCommerce CSV import) is WooCommerce’s built-in functionality that enables you to add or update many products to your online store simultaneously.
Here’s when you should think about WooCommerce CSV import:
- You are just getting started with your online shop and have tons of products to launch
- You want to migrate product data from another platform to WooCommerce
- You want to update information on existing products (e.g, you are running a flash sale and need to update your prices for all products quickly instead of updating them individually).
How To Import Products Into WooCommerce Using WooCommerce Product Importer?
If you are just getting started or want to update information on your current WooCommerce products, follow our step-by-step instructions below on how to import products into WooCommerce manually!
Step 1: Download WooCommerce product CSV file
It’s noteworthy that WooCommerce product importer helps both CSV and TXT codecs, but we exceptionally endorse you to use CSV report layout for better business enterprise.
Though you can prepare your WooCommerce import CSV file from scratch using Microsoft Excel or Google Sheets, you should download CSV import WooCommerce file sample to save time.

WooCommerce product import CSV file sample
Step 2: Fill in your CSV files
Depending on the complexity and size of your product catalog, the attributes you need to fill in your CSV file will vary. Nevertheless, here is a short list of essential attributes most WooCommerce store owners have:
- Product ID
- Name
- Short description
- Description
- Published (1 for yes, 0 for no to indicate if the product should be published upon import)
- Visibility in Catalog (type “visible” or leave it blank)
- Regular Price
- Sale Price
- In Stock (1 for yes, 0 for no)
- Stock
- Weight
- Images
With non-image attributes, here are a few things you should take note of:
- If you include dates in your CSV, stick to your local timezone
- Use “,” to separate multiple values within a data field (e.g. WooCommerce import variable products)
- Use “>” to indicate hierarchy in the Category field (e.g. “Clothing > Men”)
- Use “1” to indicate true and “2” to indicate false values
And since your product images can make or break your sales, adding product images to your CSV file is a must, not a plus. Follow the easy steps below to add images to your CSV:
- Upload your product images to WordPress
- Choose Copy URL to clipboard option for each uploaded image.

Upload your product images to WordPress
- Paste the image URLs into the image field for each item.

Paste the URL you copy from WordPress to your CSV file
Pro tip: You can import more than one image for one product by putting the image URLs in one cell and separating them by commas. The first URL will be your main product image, and the other URLs will be used as supplementary images on your product pages.
Step 3: Import products to WooCommerce
After preparing your CSV file, it’s time to import products into your WooCommerce store:
- Log in to your WordPress website > Click Products > Hit the Import button.
- Click “Choose File“, and select the CSV file you’ve prepared
- Don’t forget to tick the Update existing products option if it’s the purpose of your importing.
- Click “Continue” and proceed to the next step.

Import CSV into WordPress WooCommerce
Step 4: Map product fields
Now that your CSV file is prepared, let’s map product field. This crucial stage ensures that the information in your CSV file aligns correctly with the related product fields in WooCommerce.
Though WooCommerce will automatically map similar fields for you, it’s important to review and manually adjust any discrepancies.
Start by focusing on the key fields like SKU, Name, Short Description, Description, Published, and Visibility in Catalog.

Ensuring WooCommerce product attributes align
Examine other essential column names to ensure they’re also correctly matched. These include Regular Price, Sale Price, In Stock?, Stock, Images, Type, Categories, Tags, and any Attribute fields you use.

Other crucial product data fields like sale price, categories, etc.
Don’t forget, if there are fields you won’t use in your store, like sale prices or attributes, simply set them to “Do Not Import.” This helps customize the import process to your specific requirements.
Once all the necessary product fields are successfully mapped, click “Run the Importer” to transfer your product data from the CSV file to your WooCommerce store.

Choose Run the importer to kick off the WooCommerce import products CSV
Step 5: Finish importing products and review
Once the import is complete, you will receive an Import Complete message, along with the number of products successfully imported. Double-check that this number matches the total from your WooCommerce CSV import list.
Next, review the imported products to ensure a smooth process. While reviewing the product list, pay close attention to critical details like Name, SKU, Stock, Price, Images, and Categories.

Check your imported products
Additionally, don’t forget to check inventory counts, attributes, and shipping sizes. If you plan to import attributes, remember to set the Type column in your CSV to Variable to ensure the attribute imports display correctly.
How To Import Products Into WooCommerce Automatically?
If you are migrating from another platform to WooCommerce, we highly advise you to import your products to WooCommerce using LitExtension’s automatic migration tool.
This is because if you export your products in your current store and import them to WooCommerce as we showed above, you will have to reformat your CSV file so it meets WooCommerce requirements. From our experience, this can lead to lots of errors.
Not to mention that there are tons of data that needs to be imported besides products, like orders, customer profiles, etc.
For instance, if you quickly migrate from another platform to WooCommerce, here’s how the WooCommerce bulk product upload works with LitExtension.
Step 1: Set up Source Cart & Target Cart
Begin by signing up for an account on LitExtension site. Once you’re on the migration page, click on “Create New Migration.”
Then, choose your current platform as the Source Cart Type. Depending on your current platform, the step you need to do and the information you need to provide might vary a bit:
- For open-source platforms (Magento, PrestaShop, etc.): Enter your current’s store URL and install LitExtension Connector file.
- For hosted platforms (Shopify, BigCommerce, etc.): Enter your current store’s URL and provide the API password on your store.
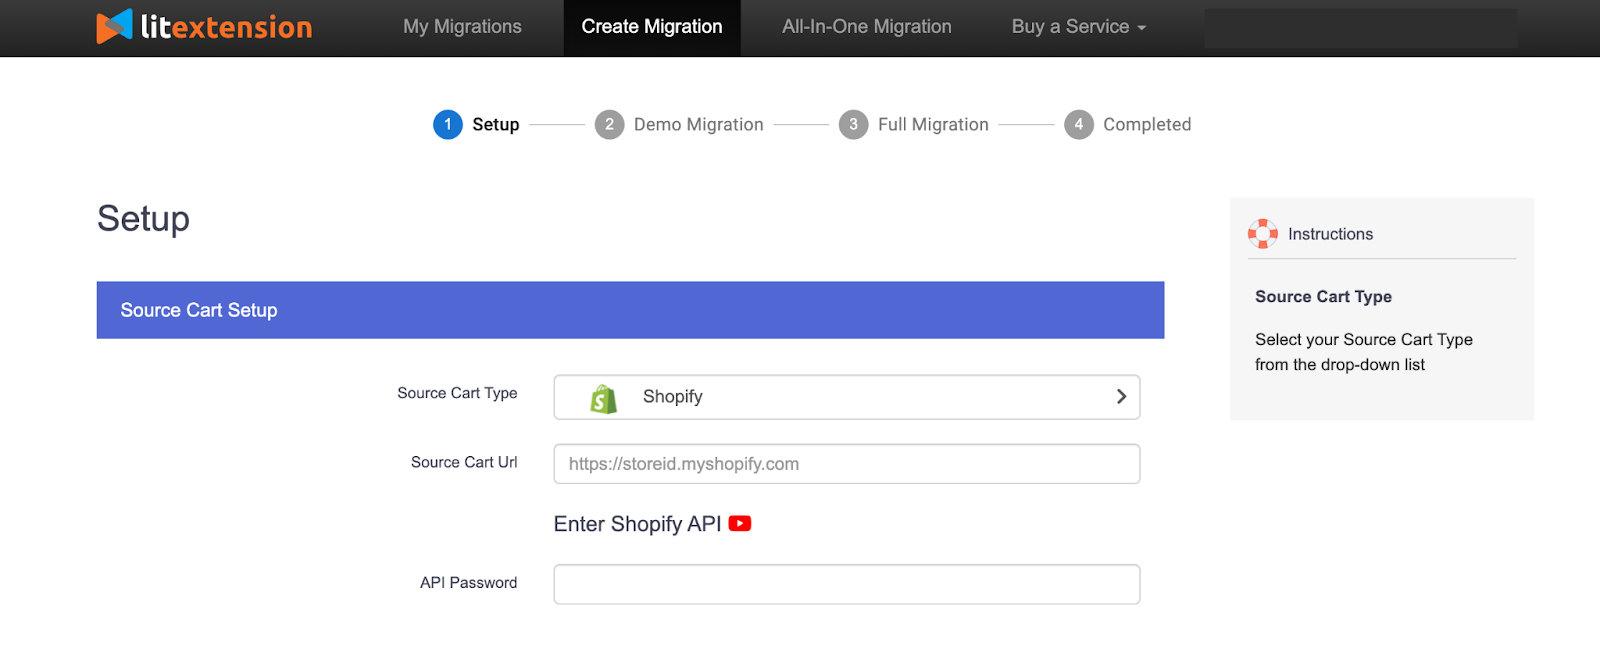
For instance, if your current store is hosted on Shopify, then you need to provide your Shopify API key
Moving on to the Target Cart setup, choose WooCommerce as the Target Cart. Download the LitExtension Connector by clicking ” LitExtension Connector,” then extract the zip file and upload it to your Source Store’s root folder.

Choose WooCommerce as your target cart
Once you see the “Connection was successfully installed” message, click “Next: Configure your Migration” to proceed to the next step.
Step 2: Select data to transfer to WooCommerce
After setting up your Shopify and WooCommerce cart, the next thing to do is choose the entities you want to migrate. You can check ‘Products’ or ‘Select All‘ to import all data into your WooCommerce store.

Choose the entities you want to migrate
LitExtension also offers Additional Options for more complex migration needs. For instance, you can choose to migrate images, strip HTML code, create 301 redirects, etc.
Additional entities are available for more advanced migrations
Step 3: Perform full migration
Before migrating your data from your current platform to WooCommerce, we advise you to try their Demo Migration to understand how it works first. Alternatively, you can choose “Skip Demo Migration” to begin the WooCommerce product import process.
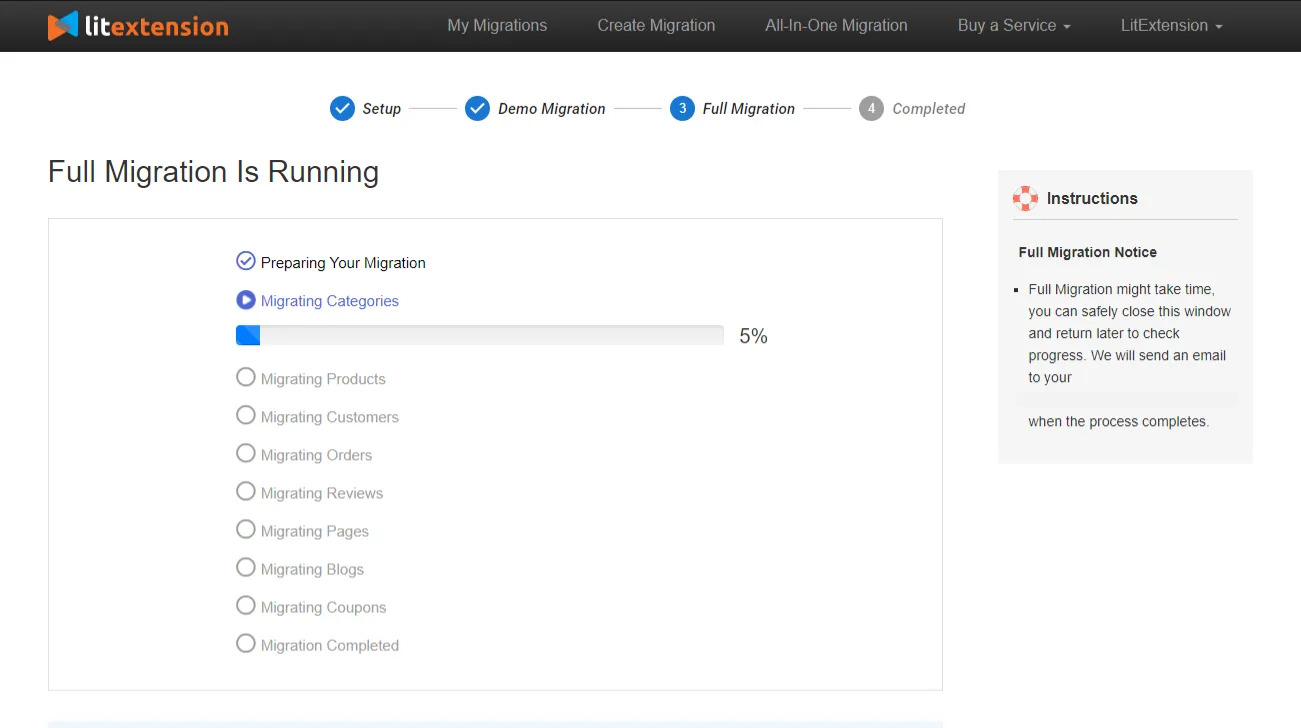
A progress bar will keep you informed about the WooCommerce product import progress
What’s great is that you don’t need to keep your browser open. When the data is successfully transferred to your WooCommerce shop, LitExtension will send you an email notification.
If you prefer extra assistance, you can opt for their All In One Migration Package, where their Customer Success Manager will support you with any question or concern.
And that’s how easy it is to import WooCommerce products using an automated service!
| 💡 What to do after migrating your store to WooCommerce? Check the migration results: Ensure that your product data, images, orders, customers, and any information you choose to migrate with LitExtension is properly migrated.Choose a theme: Since you cannot migrate your theme, the next step is choosing a theme that best reflects your brand style. Remember to test your theme’s speed on Google PageSpeed Insights first.Set up payment: Enable payment options for your customers so they can make purchases securely on your siteSet up shipping: Set up your WooCommerce shipping zones, rates, and any extra configurations based on your product offerings and customer locations.Add necessary plug-ins: Don’t forget to add needed plug-ins to your WooCommerce store to optimize your store for conversions. |
Frequently Asked Questions
How do I import and export products in WooCommerce?
Here’s how to do product import export for WooCommerce:
- To export products:
- Go to WooCommerce > Products.
- Click Export button.
- Select the columns, product types, and product categories you want to export.
- Click Generate CSV.
- To import products:
- Go to WooCommerce > Products.
- Click Import at the top of the page.
- Click Choose File and select the CSV file you want to import.
- Click Continue.
- Map the columns in your CSV import file to the WooCommerce product importer fields.
- Click Run the Importer.
How do I add products to WooCommerce easily?
The easiest way to add products to WooCommerce is to leverage the built-in import feature to add many products simultaneously using a CSV file.
Nevertheless, if you migrate from other platforms to WooCommerce, we recommend LitExtension’s migration tool to add products to your WooCommerce store.
How do I import Excel products into WooCommerce?
To import Excel products into WooCommerce, make sure you save your Excel under a CSV file and follow the same steps we mentioned above.
How do I bulk import products into WordPress?
Install WooCommerce plug-in to your WordPress website first and then follow the same steps we gave above to import products into your WordPress website via WooCommerce product importer.
Final Thoughts
All in all, WooCommerce product importer is quite handy if you want to quickly start an eCommerce store and populate products into your store or make updates like price changes to your existing items. However, if you are migrating from another platform to WooCommerce, we highly recommend using LitExtension’s automatic migration tool for a more seamless and error-free product import.
Whichever method you choose, we hope you can learn how to import products into WooCommerce properly after reading this article.
